

Drones are a game changer. That’s a bold statement to start with. But they have democratized the entire aerial media industry. For a relatively small amount of money photo and video professionals have the possibility to capture beautiful video and photos from a bird’s eye view.
After a while considering getting a drone I finally pulled the trigger on a DJI Phantom 3 Advanced. I still consider the cheapest option, that can produce useable shots at the time of writing.
Never having flown one before I was a little cautious about making the first take-off. That was soon forgotten as I got in the air. I was blown away by how easy it was to maneuver. Having played video games as a kid the controls were very intuitive. The drone stayed fixed in position when let go of the controls.
Another thing that’s great about these systems is the portability. Being able to strap the Phantom on a backpack and head on an adventure is great. The future looks very promising with improved portability and making it possible to capture unique aerials from remote areas. The DJI Mavic and GoPro Karma are clear signs of where things are going. In the future photographers will not leave the house without a drone in the pack.

But where is the “but”? The but comes here: But drones are not wonder machines they have their limits too.
Camera.
The dynamic range is limited on the cameras (on the "affordable" drones). Which makes it hard to get good looking footage in harsh light e.g. high noon on a sunny day, where there is strong contrast between the bright highlights and the dark shadows. To get the best looking footage utilize natural soft (diffuse) light which means: Shooting during golden hour or when it is overcast where the light is “softer” . I prefer golden hour as it creates a more “magical” feel but it of course depends on what you are shooting and what feeling you want to evoke with the shot.
Another solution to the low dynamic range is to do bracketing. Bracketing is where you shoot several photos at different exposures and blend them in post production. Basically you shoot an exposure for the shadows, the mid-tones, and the highlights and merge them. Apparently this only works for stills unless you want to do some black magic in post production with the video footage.
Too little light is also a big challenge for the camera. The tiny sensor produces a lot of noise when the ISO goes up. ISO 200 is the limit for clean footage. With that said I would rather have a noisy shot than no shot at all. I have pushed the ISO way too high just to get the shot. If the shot is spectacular most “regular people” wont notice the grain.
When shooting stills the most important thing setting-wise is to shoot in RAW, which gives you much more room to play with in post production.
But watch this space! Things are moving rapidly in the drone industry. 2013 Phantom 1 was released. With a 10 min flight time and a GoPro mounted directly on the drone. Now the flight time has close to tripled and underneath sits a gimbal stabilized 4K camera which is improving rapidly! The Phantom 4 Professional can shoot 20 megapixel RAW stills with almost 12-stops of dynamic range and 4K video at 60fps with a 100 mbit/s bitrate. To say it in non-technical terms: It's a great camera!
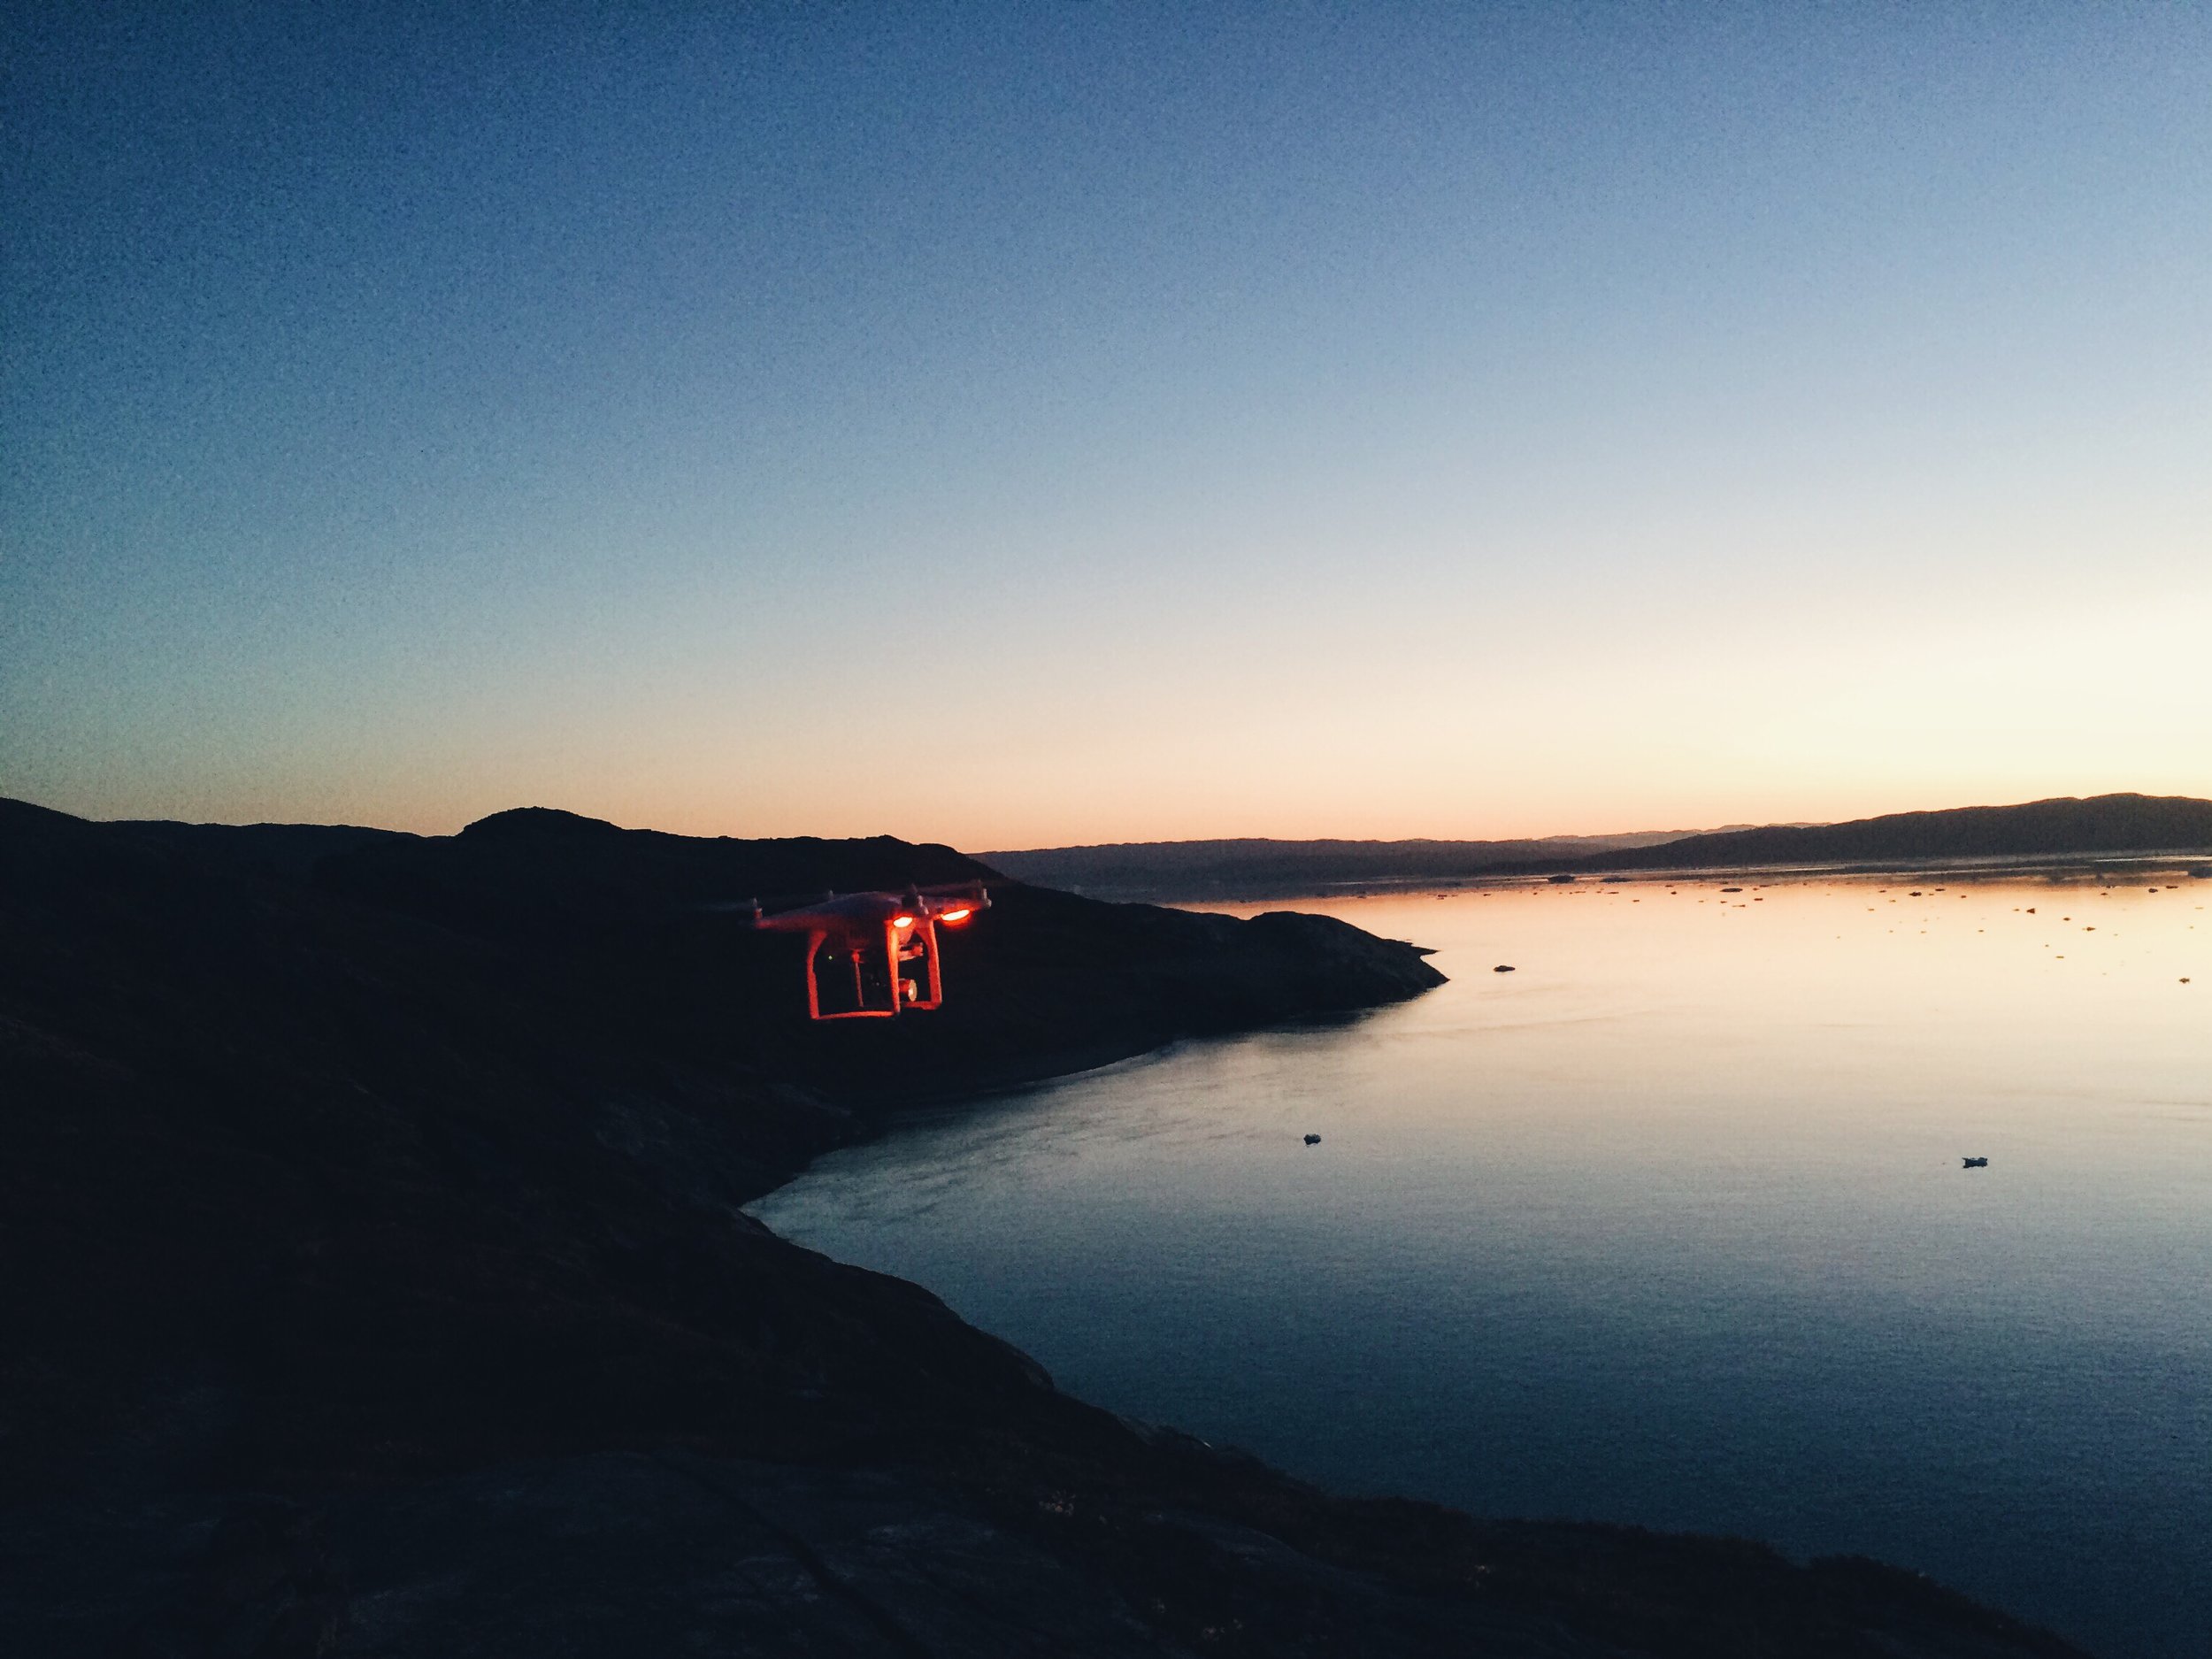
A noisy shot is better than no shot. Here I'm flying under the midnight sun in Greenland.
Speed.
Another “but” is the limited speed. The Phantom 4 and the Phantom 4 Professional does approx. 70 km/h in sport mode which is fast. I have done some tracking shots of cars with the Phantom 3 and the limited speed is, well, limiting. If you need more speed the Inspire 2 can do 107 km/h according to DJI. That is fast (and possibly dangerous), and demands a very skilled pilot. But the slower drones can work just coordinate the speed with the driver or just skip the tracking shot and spend the time and battery life on some other shots.
Battery.
Now I mentioned battery life. I can safely fly for around 15 min. on one battery depending on the conditions. That sounds like a short amount of time and it can be. So to make the most of it you have to plan ahead. Having a clear vision of what you want to create is important. Naturally this can be hard in the beginning as you don’t know what is possible but with more flight time this gets easier. A good idea is to view others work to be inspired and to see what is possible. Although batteries and efficiency is getting better which means more flight time per battery. The Phantom 4 Professional can fly 30 min. according to DJI. Subtract 5 min and you have a realistic flight time of 25 min. depending on the conditions.
The Creative
The basics of photography composition theory still apply when shooting with drones. Look for patterns and shapes around you. This is actually a little challenging as you have to envision how it will look from above. The classic drone photo perspective is the top-down shot which works really well as it is very graphic and shows a different perspective on everyday objects.
When it comes to video the same apply but to create those gorgeous cinematic shots, motion with strong parallax works really well. Parallax is “a displacement or difference in the apparent position of an object viewed along two different lines of sight”. If you put a finger out in front of you and move your head from side to side you will experience parallax. Parallax shows the relationship between objects - it creates depth and size perception. The closer you are to things the stronger the effect - which requires a lot of pilot skills. I have had my share of close calls.
Drones are definitely a part of the future. With drones becoming very accessible from a monetary and a user friendliness standpoint it is a tool everyone should have. With that said there is still room for improvement especially regarding the quality of the cameras but things are changing rapidly so in a few years that will not be a problem. But knowing what the flaws are makes it possible to work around them and creating spectacular results. So what are you waiting for? Ready for take-off?


